Water Leaking from the Ceiling When It’s Raining? Diagnosis and Permanent Repair Solutions
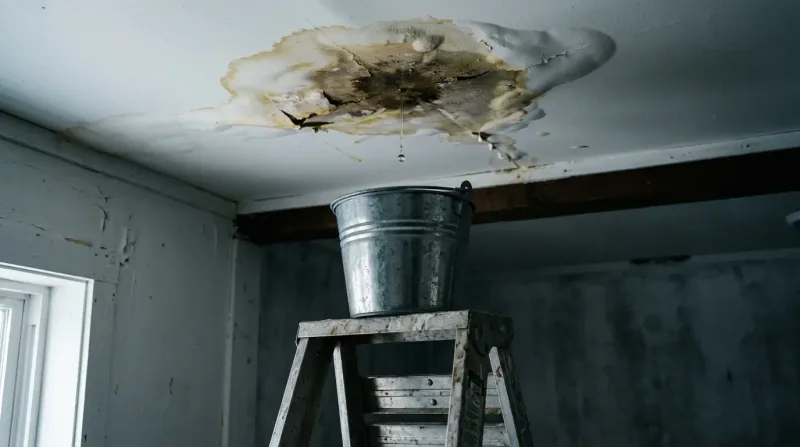
Few household emergencies create more immediate panic than discovering water dripping from your ceiling during a rainstorm. That telltale drip or expanding brown stain can trigger instant stress, especially when it occurs in the middle of the night during heavy rainfall. Water leaking from the ceiling when it rains isn’t just annoying – it’s a warning sign that demands quick attention to prevent structural damage, mold growth, and costly interior repairs.
In this guide, we’ll walk you through the critical first steps to take when you spot a leak, help you identify the most likely causes, and outline some repair options. We’ll clarify when DIY solutions are appropriate and when you should consider professional intervention. By the end, you’ll have a clear action plan to address your leaking ceiling and protect your home from further damage.
Immediate Safety Steps When Your Ceiling Leaks
When you discover water leaking from the ceiling when it rains, taking swift action can prevent electrical hazards and minimize damage to your home:
Turn Off Electrical Power
If water is dripping near light fixtures, fans, or electrical outlets, immediately turn off the power to that area at your breaker box. Water and electricity create a dangerous combination that could lead to fire or electrical shock.
Contain the Water
Place buckets, pots, or other containers under active drips to collect water. For ceiling areas bulging with trapped water, carefully puncture the center with a screwdriver to release the water into your container in a controlled manner.
Document Everything
Before making emergency repairs, take clear photos and videos of all visible damage. This documentation will be essential if you need to file an insurance claim later.
Move or Cover Belongings
Quickly relocate furniture, electronics, and valuables away from the leak. Cover larger items with plastic sheeting if they can’t be moved.
5 Common Causes of Ceiling Leaks During Rain
Understanding what’s causing your ceiling roof leak is crucial to implementing the right solution. Here are the most frequent culprits:
1. Damaged or Missing Shingles
Your roof’s shingles are its first line of defense against the elements. When they become cracked, curled, or go missing after storms, water can penetrate below. Look for:
- Visible gaps in your roof’s surface
- Granules from shingles are collecting in gutters
- Dark patches on your roof where shingles have lost their protective coating
Homes with asphalt roofing are particularly susceptible to shingle damage after severe weather events, such as hail.
2. Flashing Failures
Metal flashing creates waterproof seals at roof joints, chimneys, and other penetrations. When flashing cracks, rusts, or comes loose, it creates entry points for water. Common flashing problem areas include:
- Around chimney bases
- At roof valleys where two roof planes meet
- Along walls that adjoin roof sections
- Around skylights and dormers
3. Clogged Gutters and Downspouts
When debris blocks your gutter repair system, rainwater can’t drain properly. This causes water to:
- Back up under shingles
- Overflow onto fascia boards and soffits
- Seep into your home’s walls and eventually your ceiling
Regular gutter cleaning is essential, especially after storms and during the fall when leaves are dropping.
4. Roof Leaks Around Vent Pipes
Plumbing vents, exhaust fans, and other roof penetrations often leak due to failed seals. Roof leaks around vent pipes typically happen because:
- Rubber gaskets and boots crack from sun exposure
- Improper installation left gaps around the penetration
- The flashing around the pipe has corroded or come loose
These leaks often appear as water spots on ceilings near bathroom areas, where vent pipes are commonly located.
5. Ice Dams (In Colder Climates)
During winter, heat escaping from your home can melt snow on your roof. When this water refreezes at the cooler eave edges, it creates ice dams that force water under shingles and into your home.
DIY Leak Diagnosis: Finding the Source
Locating the exact entry point of water can be challenging since water often travels along rafters or other structures before dripping onto your ceiling.
Attic Investigation
If you have attic access:
- Wait for daylight hours
- Bring a bright flashlight
- Look for water stains, damp insulation, or mold
- Trace water trails upward to find the entry point
- Check around chimneys, vents, and roof valleys first
Visual Roof Inspection (From Ground Level)
For safety reasons, start with a ground-level inspection:
- Use binoculars to scan for obvious damage
- Look for missing shingles or damaged flashing
- Check for sagging areas or visible holes
- Examine gutters for proper attachment and clearance
Common Misleading Signs
Water often enters at one point but travels before becoming visible on your ceiling. The leak location you see inside might be several feet from the actual roof penetration point.
Temporary DIY Repair Solutions
When professional help isn’t immediately available, these temporary measures can buy you time:
Emergency Tarping Technique
For larger compromised areas:
- Purchase a heavy-duty tarp that extends at least 4 feet beyond the damaged area on all sides
- Secure tarp edges with boards, bricks, or sandbags (avoid nailing into your roof if possible)
- Position the tarp so that water runs off rather than pooling
Roofing Cement for Small Issues
For minor, isolated leaks:
- Apply roofing cement to small holes or cracks during dry conditions
- Use a putty knife to press the cement into the gaps around flashing
- Cover the repair with a piece of aluminum flashing for added protection
When Not to DIY
Some situations demand professional attention immediately:
- You spot structural damage or sagging
- The leak affects the electrical wiring
- Your roof has a steep pitch, making it unsafe to access
- The affected area is large or spans multiple sections
- Previous DIY attempts have failed
Professional Repair Options: How to Repair Metal Roof Leaks and More
Different roofing materials require specific repair approaches. Professional roofers will assess and implement the right solution for your roof type.
Asphalt Shingle Repairs
For traditional shingled roofs, professionals typically:
- Replace damaged or missing shingles
- Apply new underlayment where needed
- Reseal flashing connections
- Address any rotted roof decking
How to Repair Metal Roof Leaks
Metal roofing requires specialized techniques. Professionals know how to repair metal roof leaks by:
- Identifying and sealing seam separations
- Replacing damaged fasteners or adding new ones
- Applying appropriate metal roof sealants
- Addressing corrosion issues before they create holes
Flat Roof Solutions
For commercial-style flat roofs, repairs often involve:
- Applying specialized membrane patches
- Addressing drainage issues
- Ensuring proper slope for water runoff
Insurance and Warranty Coverage
Understanding your financial protection options helps manage repair costs.
Does Insurance Cover Leaking Roof Damages?
The answer varies based on circumstances:
- Sudden damage from storms is typically covered
- Gradual damage from neglect usually isn’t
- The age of the roof affects coverage decisions
When considering whether insurance covers leaking roof damage, remember these key points:
- Document everything thoroughly before repairs
- Report the damage promptly
- Understand your deductible before filing
- Take reasonable steps to prevent further damage
Home Warranty Roof Leak Protection
If you have a home warranty, it may cover some roof repair costs:
- Most home warranty roof leak provisions have specific conditions
- Warranties typically cover only certain components
- There’s often a separate deductible for roof claims
- Coverage limits may apply (often $500-$1,500)
Always review your warranty terms carefully before assuming coverage.
Repair Costs: How Much to Repair a Leak in the Roof
Several factors affect how much it costs to repair a leak in the roof:
- The source and extent of the leak
- Your roof type and pitch
- Your geographical location
- Whether structural repairs are needed
- Time of year and emergency status
Typical professional repair costs range from:
- $300-$600 for simple flashing or shingle repairs
- $600-$1,200 for more extensive damage
- $1,000-$3,000 for significant structural issues
- $8,000+ for partial roof replacement in severe cases
Preventing Future Ceiling Leaks
Proactive maintenance is your best defense against future leaks:
- Schedule professional roof inspections annually
- Clean gutters and downspouts seasonally
- Trim overhanging tree branches
- Address minor issues promptly before they worsen
- Look for interior signs of roof damage, like water stains or mold
- After storms, check for signs of hail roof damage in Cumming GA, or your local area
Prepare for The Storm with Brandon J Roofing
Finding ceiling leaks during rainstorms is alarming, but quick action and proper repairs can resolve the issue before it causes extensive damage. Remember that while temporary DIY measures can help in an emergency, professional assessment and proper repairs are essential for long-term roof integrity. Don’t wait until a small drip becomes a major problem—addressing ceiling leaks promptly saves money and protects your home’s value.
Brandon J Roofing provides expert diagnosis and repair services for all types of roof leaks throughout the Cumming area. Our experienced team understands Georgia’s unique weather challenges and how they affect different roofing materials. We offer emergency services for active leaks and comprehensive solutions that address the root cause of your problem, not just the symptoms. With our professional approach, your home will stay dry and protected through every storm.