How to Document Roof Damage for an Insurance Claim: A Complete Photo Guide
A storm just rolled through, and now your roof looks worse for wear. Maybe you spotted missing shingles, dented gutters, or debris scattered across the yard. Filing an insurance claim feels like the next logical step, but where do you start? The truth is, the strength of your claim often comes down to one thing: your documentation. Poor photos or missing details can lead to a denied claim or a smaller payout than you deserve.
This guide will walk you through how to document roof damage for insurance the right way. You’ll learn what to photograph, how to capture clear images, and what details adjusters look for. By the end, you’ll have a step-by-step plan to build a strong claim and get the coverage you’re owed. So grab your phone, a notepad, and let’s get started.
Why Strong Documentation Makes or Breaks Your Claim
Insurance adjusters rely heavily on evidence. If your photos are blurry, missing key angles, or don’t show the full scope of damage, your claim can get pushed aside or undervalued. Strong documentation tells a clear story. It shows what was damaged, when it happened, and how bad it really is.
Good records also protect you if the insurance company disputes your claim. With clear photos, dates, and notes, you’ll have proof that’s hard to argue with. Plus, documentation helps your roofer give an accurate estimate, which speeds up the whole process.
What Adjusters Want to See
- Wide shots of the entire roof and home exterior
- Close-ups of each damaged area
- Photos that show scale (using a coin or ruler)
- Dated images that match the storm event
- Interior shots of any leaks or water damage
Safety First: Prep Before You Climb
Before you even think about getting on the roof, take a breath. Roof work is dangerous, especially after a storm when shingles can be loose, wet, or unstable. If you’re not comfortable climbing up, don’t risk it. You can take great roof damage photos for insurance from the ground using a zoom lens or a drone.
Tools You’ll Need
- A smartphone or digital camera with good resolution
- A sturdy ladder (if you’re going up)
- Non-slip shoes
- A notepad and pen
- A measuring tape
- A flashlight for attic inspections
- A coin or ruler for scale shots
If the damage looks severe or you have any doubts about safety, call a professional. A licensed roofer can handle the inspection and provide expert documentation.
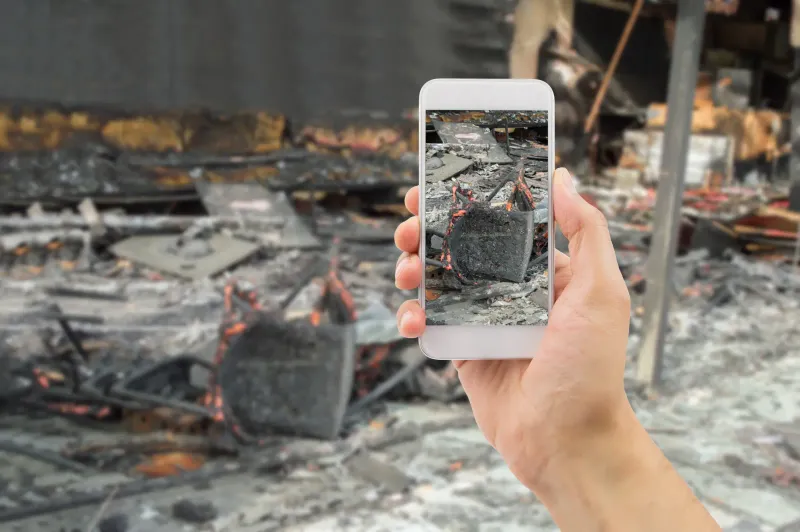
How to Photograph Roof Damage Like a Pro
Knowing how to photograph roof damage properly can make a huge difference. You want photos that are clear, well-lit, and tell the full story. Here’s how to do it right.
Start With Wide Shots
Begin by taking photos of your entire property from the street. Capture all sides of the home. These wide shots give context and show the overall condition of your roof and exterior. Take pictures from multiple angles so the adjuster can see the layout clearly.
Move In for Mid-Range Shots
Next, zoom in on specific sections of the roof. Focus on areas with visible damage, such as missing shingles, dented flashing, or damaged vents. These mid-range shots bridge the wide views and the close-ups.
Capture Close-Ups With Scale
Now get up close. Take detailed photos of every damaged spot. Place a coin, ruler, or chalk circle near the damage to show size. Close-ups are especially helpful for hail damage, where dents and bruising can be hard to see without context.
Tips for Better Photos
- Shoot in natural daylight when possible
- Avoid shadows that hide damage
- Take multiple shots of the same area from different angles
- Use your phone’s date and location stamp features
- Don’t crop or edit your photos before submitting them
Building a complete set of roof damage photos for insurance is the single best thing you can do to support your claim.
Your Roof Insurance Claim Documentation Checklist
A solid roof insurance claim documentation checklist keeps you organized and makes sure you don’t miss anything. Here’s what to include in your file.
Exterior Documentation
| Area | What to Photograph |
| Roof surface | Missing, cracked, or curled shingles |
| Gutters | Dents, separations, or debris |
| Flashing | Bent, missing, or damaged sections |
| Vents and chimneys | Dents, cracks, or displacement |
| Siding | Hail dings or impact marks |
| Windows | Cracks or broken glass |
| Yard | Fallen branches, debris, or hail |
Interior Documentation
- Ceiling stains or water spots
- Attic leaks or wet insulation
- Walls showing moisture damage
- Damaged personal items from leaks
Supporting Documents to Gather
- Weather reports from the storm date
- Receipts for any emergency repairs
- Your original roof installation records
- A copy of your insurance policy
- Notes from your roofer’s inspection
Following a complete roof insurance claim documentation checklist makes sure nothing slips through the cracks. For a deeper dive on this, check out our guide on how to maximize roof damage claim payouts.
Common Types of Damage and How to Spot Them
Different storms cause different types of damage. Knowing what to look for helps you document everything an adjuster needs to see.
Hail Damage
Hail leaves round dents and bruises on shingles. Look for spots where the granules have been knocked off, exposing the dark asphalt below. Check soft metals like gutters and vents, since hail dents show up clearly there. For more details on this, read our post on filing a hail damage insurance claim.
Wind Damage
High winds can lift, tear, or completely rip shingles off. Look for shingles that are creased, curled, or missing. Wind damage often shows up along the edges of the roof first. Learning how to photograph roof damage caused by wind means capturing those lifted edges before they settle back into place or blow away.
Debris and Impact Damage
Fallen branches or flying objects can puncture shingles or crack roof decking. Photograph any debris on or near the roof before you clean up. Yes, even the mess in your yard matters.
Water Damage
Water damage often shows up after the storm passes. Check ceilings, attics, and walls for stains, sagging, or moisture. A flashlight helps you spot wet spots in dark attic corners.
When to Call a Professional Roofer
Some damage is obvious, but a lot of it isn’t. A trained eye can catch things you’d miss from the ground. Hairline cracks, soft spots in the decking, and minor hail bruising can all lead to bigger problems down the road if they’re not documented now.
Understanding how to document roof damage for insurance is helpful, but pairing your work with a professional inspection makes your claim much stronger. Roofers can provide written reports, detailed estimates, and even meet with your adjuster to walk through the damage together.
Benefits of a Professional Inspection
- Expert eyes catch hidden damage
- Written reports add credibility to your claim
- Roofers know what adjusters look for
- They can spot code violations or pre-existing issues
- You get an accurate repair estimate
If a storm hits your area, schedule a roof inspection as soon as it’s safe. The sooner you document the damage, the easier it is to tie it to the specific weather event.
Mistakes to Avoid When Filing Your Claim
Even with the best intentions, homeowners often slip up in ways that hurt their claims. Here are some common mistakes to avoid.
Waiting Too Long
Most insurance policies have a time limit for filing claims. Don’t wait weeks to start documenting. Damage can worsen, and adjusters may argue that the recent storm didn’t cause it.
Cleaning Up Too Soon
It’s tempting to clear debris right away, but hold off until you’ve photographed everything. Once it’s gone, you can’t prove it was there.
Doing Major Repairs Before the Adjuster Visits
Emergency repairs to prevent more damage are fine and often required. But major repairs before the inspection can hurt your claim. Document everything first, then fix what’s urgent.
Relying on One Photo per Area
One blurry photo isn’t enough. Take several shots of each damaged area from different angles and distances. The more, the better.
Skipping the Interior
Many homeowners forget to document interior damage. Water stains, ruined drywall, and damaged belongings all count toward your claim.
Don’t Face The Aftermath Alone- Call Brandon J Roofing!
At Brandon J Roofing, we know how stressful storm damage can be. Filing an insurance claim feels overwhelming, but you don’t have to figure it out alone. Our team has years of experience helping homeowners document damage, work with adjusters, and get the repairs they need. We combine expert craftsmanship with a client-first approach, so you always know what’s happening with your roof and your claim.
Whether you need a thorough inspection, professional documentation, or full roof repair after a storm, we’re here to help. Our local roofing experts know exactly what insurance companies look for and how to make your claim as strong as possible. Don’t let damage sit and get worse. Reach out today and let us guide you through every step.