Diagnose and Fix a Leaking Chimney: Essential Flashing, Crown, and Mortar Repair
Water stains on your ceiling or walls near the chimney are often the first signs of trouble brewing above. These seemingly minor leaks can quickly escalate into serious structural damage, mold growth, and costly repairs if left unaddressed. When a chimney leaks water, the culprit is typically one of three things: damaged flashing, a cracked crown, or deteriorating mortar joints.
Understanding the source of chimney leaks is crucial for effective repairs. This guide will walk you through identifying the exact cause of your leaky chimney and provide practical steps to fix the issue. Whether you’re dealing with faulty flashing, crown damage, or mortar problems, you’ll learn how to fix a leaking chimney using both DIY techniques and when it’s time to call in professional help.
Understanding Why Chimneys Leak: Common Causes and Warning Signs
The Main Leak Sources in Chimney Systems
Chimney leaks typically originate from three primary sources. First, deteriorated flashing—the metal strips sealing the gap between your chimney and roof—can separate or crack. Second, the chimney crown—the concrete top that protects the brick structure—may develop cracks.
Third, mortar joints between bricks can deteriorate over time, allowing water to penetrate.
Weather exposure, age, poor installation, and lack of maintenance all contribute to these vulnerabilities. Understanding these weak points helps target your inspection and repair efforts effectively.
Signs Your Chimney Is Leaking
Before climbing onto your roof, look for these telltale signs of a leaking chimney:
- Water stains on walls or ceilings near the chimney
- Damp or musty smells in rooms adjacent to the chimney
- Visible moisture around the fireplace
- Rust on metal fireplace components
- White staining (efflorescence) on exterior chimney bricks
- Spalling bricks (where the face of the bricks flakes off)
- Damaged wallpaper or paint near the chimney
Early detection prevents minor leaks from becoming major restoration projects.
Diagnosing Chimney Leaks: Step-by-Step Guide
Visual Inspection Techniques
Begin your diagnosis with a thorough visual inspection. Using binoculars from ground level, examine your chimney for:
- Damaged or missing flashing
- Cracks in the chimney crown
- Missing or cracked mortar joints
- Damaged or missing chimney cap
- Cracked or spalling bricks
For a closer look, you’ll need ladder access to the roof. Always prioritize safety—wear non-slip shoes, use a properly secured ladder, and consider having a helper spot you. If you’re uncomfortable with heights, this is your first sign that professional help may be necessary.
Water Testing Methods
When visual inspection doesn’t reveal obvious issues, a water test can help pinpoint the leak source:
- Have a helper inside watching for water infiltration
- Start low on the chimney with a garden hose, spraying at a downward angle
- Spray for 10-15 minutes at each level before moving higher
- Stop when water appears inside to identify the entry point
This methodical approach helps isolate exactly where water is entering your home, making repairs more targeted and effective.
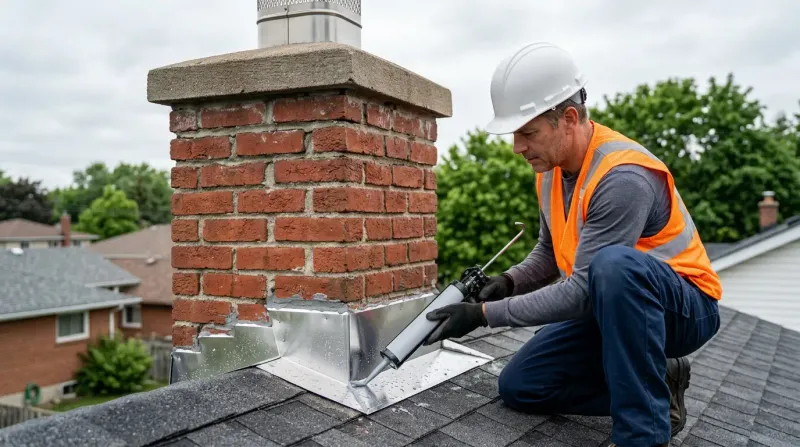
Fixing Faulty Chimney Flashing
Assessing Flashing Damage
Flashing is usually the first to blame when a chimney leaks water. Inspect for:
- Rust or corrosion on metal flashing
- Gaps between flashing and the chimney or the roof
- Cracked or missing caulk at seams
- Loose or missing flashing pieces
Proper assessment determines whether simple repairs or complete replacement are necessary.
DIY Caulking and Sealing
For minor flashing issues, high-quality silicone caulk designed for roofing applications can provide a temporary solution:
- Clean the area thoroughly, removing debris and old caulk
- Apply roof-grade silicone caulk to gaps between flashing and chimney
- Seal the counter flashing (upper portion) where it meets the chimney
- Check step flashing (L-shaped pieces) where they meet the roof
This approach can buy you time but may not permanently resolve significant flashing failures.
When to Replace Flashing Completely
Consider complete flashing replacement when:
- Multiple areas show corrosion or separation
- Previous caulking repairs have failed repeatedly
- The flashing has pulled away from the chimney
Flashing replacement involves removing shingles, installing new flashing components, and properly integrating them with your roofing shingle repair. This complex process typically requires professional expertise to ensure watertight results.
Repairing Damaged Chimney Crowns
Applying Sealant for Minor Cracks
The chimney crown protects your entire chimney structure from water infiltration. For hairline or small cracks:
- Clean the crown surface thoroughly
- Apply a flexible crown sealer designed for masonry (not regular concrete)
- Ensure complete coverage, following manufacturer instructions
- Allow proper curing time before exposure to rain
Crown sealers create a waterproof membrane that can prevent small cracks from developing into structural issues.
Rebuilding a Deteriorated Crown
When a crown shows extensive damage—multiple cracks, chunks missing, or improper construction—rebuilding becomes necessary:
- Remove damaged crown material
- Build proper forms for the new crown
- Mix and pour the appropriate crown concrete mix
- Ensure proper slope for water runoff (minimum 1/4 inch per foot)
- Include an overhang with a drip edge to protect brickwork
A properly constructed crown includes steel reinforcement and extends 2-3 inches beyond the chimney with a drip edge—features often missing in older homes.
Addressing Mortar Joint Issues
Understanding Tuckpointing
Deteriorated mortar joints allow water to penetrate the brickwork of your chimney. Tuckpointing is the process of removing damaged mortar and replacing it with fresh material:
- Identify areas where mortar is crumbling, missing, or showing cracks
- Use a masonry chisel to remove damaged mortar to a depth of about 3/4 inch
- Clean out debris from the joint
- Apply new mortar matched to the existing color and composition
- Tool the joint to match the original profile
Tuckpointing not only stops leaks but also reinforces the structural integrity of your chimney.
DIY Mortar Repair Process
For small-scale mortar repairs:
- Purchase premixed mortar or mix according to the manufacturer’s instructions
- Dampen the area slightly before application
- Use a pointing trowel to force mortar deeply into joints
- Tool joints when thumbprint-hard for a finished appearance
- Keep the new mortar damp for several days to ensure proper curing
More extensive mortar deterioration may require professional tuckpointing to ensure structural integrity and proper water resistance.
Protecting Your Chimney: Caps and Crickets
How to Install a Chimney Cap
A properly installed chimney cap prevents water from entering the flue directly while also keeping out animals and debris. How to install a chimney cap correctly:
- Measure your flue opening dimensions accurately
- Select a stainless steel or copper cap with mesh sides
- Apply a bead of silicone caulk around the flue top
- Secure the cap according to the manufacturer’s instructions
- Tighten all screws and verify the cap sits level
A quality chimney cap installation typically costs $150-$500 but provides substantial protection against water infiltration and animal entry. Learning how to install chimney cap devices can be one of the most cost-effective ways to prevent future leaks.
Understanding Roof Cricket Benefits
A roof cricket chimney is a peaked structure installed behind the chimney to divert water around it rather than allowing it to pool. Consider adding a cricket when:
- Your chimney is wider than 30 inches
- The chimney is on the downslope side of the roof
- You’ve experienced repeated water issues despite other repairs
A properly constructed roof cricket chimney can dramatically reduce water exposure to your chimney’s vulnerable rear wall. This modification may be necessary during roofing replacement for optimal water management.
When to Call the Professionals & Safety Considerations
Safety Precautions for DIY Chimney Repairs
If attempting DIY chimney repairs, follow these safety guidelines:
- Never work on the roof during wet, windy, or icy conditions
- Use a properly secured extension ladder with stabilizers
- Wear non-slip footwear and safety harnesses when appropriate
- Use proper eye and respiratory protection when working with masonry
- Have a helper on the ground for assistance and safety monitoring
Remember that no repair is worth risking your safety. Many chimney issues can be temporarily addressed from inside the attic or by using professional-grade sealants applied from ladder level.
Signs You Need Professional Intervention
Consider professional help when:
- Leaks persist despite basic repairs
- The chimney shows structural damage or leaning
- Multiple issues exist simultaneously
- The repair requires extensive roof work
- You’re uncomfortable working at heights
- The chimney is part of a historic structure
Professional chimney repairs may be connected to other roofing issues, such as storm damage repair or commercial roof repair for larger properties.
Fix Your Chimney Today!
Addressing chimney leaks promptly prevents costly water damage to your home’s structure and interior. By understanding the three main culprits—flashing, crown, and mortar—you can diagnose and often repair minor issues before they escalate. When considering how to fix a leaking chimney, remember that proper maintenance is about more than just keeping water out; it’s about preserving your home’s structural integrity and ensuring your fireplace remains safe to use.
Brandon J Roofing has extensive experience diagnosing and repairing chimney leaks of all types across the region. Our certified technicians can identify hidden damage that DIY inspections might miss and provide long-lasting repairs that protect your home. Whether you need a simple flashing repair or a complete chimney restoration, our team delivers expert workmanship backed by warranties that give you peace of mind.