Hip Roof Addition: Structural Considerations, Permits, and Cost Breakdown
Planning a home addition brings a lot of excitement, but it also comes with plenty of questions. One of the biggest? How to tie the new roof into your existing home in a way that looks great and holds up over time. A hip roof addition is a popular choice because it blends beautifully with most home styles and offers strong wind resistance. Still, adding one isn’t as simple as slapping on some shingles and calling it a day.
There’s a lot to think through, from load-bearing walls and rafter sizes to local building codes and budget. In this guide, you’ll learn what makes hip roofs different, what your home needs structurally to support one, what permits you’ll need, and what the project might cost. By the end, you’ll feel ready to talk with a contractor and make smart choices for your project. Keep reading, and let’s break it all down.
What Is a Hip Roof and Why Choose One for Your Addition?
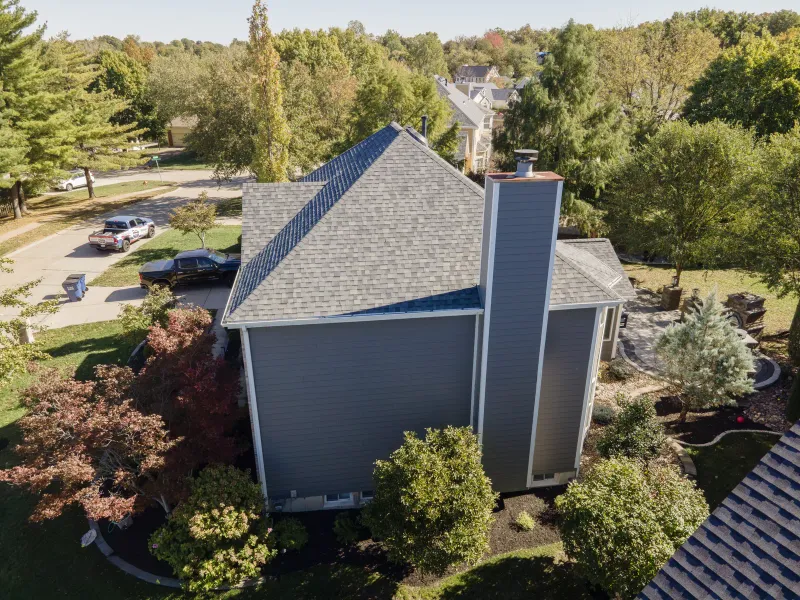
A hip roof has slopes on all four sides that meet at the top. Unlike a gable roof, there are no flat vertical ends. All sides slope down toward the walls, giving the roof a pyramid-like shape. So why do so many homeowners pick this style for their addition?
- Wind resistance: The sloped sides help wind flow around the roof, which is a big deal in storm-prone areas.
- Better drainage: Rain and snow slide off all sides evenly.
- Great curb appeal: The clean, symmetrical shape adds a classic look to almost any home.
- Extra shade: The overhangs on all sides shield your walls from sun and rain.
If you’re stuck deciding between styles like hip roofs vs. gable roofs, consult a professional roofer to determine which fits your home best.
Structural Considerations Before Adding a Hip Roof
Before you break ground, you need to know what your home can handle. Adding a hip roof adds weight, changes load paths, and may call for extra reinforcement.
Load-Bearing Walls and Support
Hip roofs spread their weight across all four exterior walls. That’s good news for stability, but it also means every wall under the new roof needs to carry part of the load. If your addition sits on walls that weren’t built to hold roof weight, you’ll need to reinforce them.
Rafters, Trusses, and Framing
The hip roof structural requirements depend on your roof size, pitch, and local snow and wind loads. Most hip roofs use either:
- Stick framing: Rafters cut and built on-site. Great for custom shapes.
- Prefab trusses: Built off-site and craned into place. Faster and often more precise.
Your contractor will size the rafters and hip beams based on span tables and code requirements. Getting familiar with basic roof framing components can help you follow the conversation.
Tying Into the Existing Roof
Adding a hip roof to an existing house takes careful planning. The new roof has to connect cleanly with the old one, both visually and structurally. Common tie-in methods include:
- Matching the pitch of the existing roof
- Using a valley where the two roofs meet
- Adding new ridge beams and supports where needed
If the pitches don’t match, your contractor may need to build a saddle or transition point. Skipping this step leads to leaks and awkward-looking rooflines. Meeting proper hip roof structural requirements during this stage is critical for long-term durability.
Permits and Building Codes You’ll Need to Handle
You can’t just start building. Almost every city and county requires permits for structural changes, and a hip roof project definitely qualifies.
What Permits Cover
A hip roof extension permit usually covers:
- Structural changes to walls and framing
- New roof design and load calculations
- Electrical work if you’re adding lights or fans
- Insulation and energy code compliance
How to Get One
Here’s what the process usually looks like:
- Submit plans drawn by a licensed contractor or architect.
- Wait for approval from your local building department.
- Schedule inspections at key points during the build.
- Get a final sign-off once work is done.
Skipping permits can cause problems when you sell your home or file an insurance claim. Applying for a proper hip roof extension permit early keeps your project legal and stress-free.
Common Code Requirements
| Code Area | Typical Requirement |
|---|---|
| Roof pitch | Minimum 4:12 for most shingle types |
| Rafter size | Based on span and load tables |
| Wind rating | Varies by region (often 90–150 mph) |
| Snow load | Set by local climate zone |
| Fire rating | Class A, B, or C depending on area |
Your local building department can give you the exact rules for your area.
Hip Roof Addition Cost Breakdown
Now for the part everyone wants to know. The hip roof addition cost varies a lot based on size, materials, labor rates, and how complex the tie-in is.
Average Cost Ranges
Most homeowners spend between $8,000 and $25,000 for a hip roof project. Here’s a rough breakdown:
| Cost Category | Price Range |
|---|---|
| Framing and lumber | $2,000 – $6,000 |
| Roofing materials (shingles, underlayment) | $1,500 – $5,000 |
| Labor | $3,000 – $8,000 |
| Permits and inspections | $200 – $1,500 |
| Design and engineering | $500 – $2,500 |
| Extras (skylights, vents, gutters) | $500 – $3,000 |
What Affects the Price
Several factors can push your costs up or down:
- Size of the addition: Bigger roof = more materials and labor.
- Roof pitch: Steeper roofs cost more to build and shingle.
- Material choice: Asphalt is affordable; metal, slate, or tile costs more.
- Access: Hard-to-reach roofs need scaffolding or lifts.
- Tie-in complexity: Matching old and new roofs takes skill and time. This is one of the biggest factors in your final hip roof addition cost.
For a broader look at pricing, our post on new roof installation cost covers what to expect for full roof projects, too.
Tips for a Smooth Hip Roof Addition Project
A little planning goes a long way. Here are some tips to keep your project on track.
Hire the Right Contractor
Look for a roofer with:
- Proven experience with additions and tie-ins
- Proper licenses and insurance
- Solid reviews from past clients
- Clear, written estimates
Ask to see photos of past projects. A good contractor will happily show off their work.
Plan Around the Weather
Roofing work depends on dry conditions. Spring and fall are usually the best times to build. Winter and heavy rain seasons can slow things down and raise costs.
Budget for Surprises
Add 10–15% to your budget for unexpected issues. Once walls come down, contractors sometimes find rot, old wiring, or framing that needs updating.
Think About the Long Term
While you’re at it, ask about:
- Better insulation
- Improved ventilation
- Skylights or solar panels
- Gutter upgrades
Doing these things now saves money and hassle later. Homeowners who are adding a hip roof to existing house structures often find these upgrades pay off quickly in comfort and energy savings.
Common Mistakes to Avoid
Even smart homeowners can slip up. Watch out for these common issues:
- Skipping permits: This can lead to fines and headaches down the road.
- Choosing the cheapest bid: Low bids often mean shortcuts.
- Ignoring drainage: Poor water flow leads to leaks and rot.
- Forgetting about matching materials: Mismatched shingles look sloppy and hurt resale value.
- Rushing the design: Take time to plan how the new roof ties into the old one.
Taking your time up front saves stress and money later.
Talk to Your Local Roofers Today
A hip roof addition is a smart, stylish way to expand your home while keeping it strong and looking sharp. Understanding the structural needs, getting the right permits, and planning your budget upfront make the whole process smoother. When done right, this kind of project boosts curb appeal, adds value, and gives you the space you need.
At Brandon J Roofing, we bring years of experience, top-quality workmanship, and a client-first approach to every project. Our team handles everything from design and permits to framing and finishing shingles, so you get a smooth, stress-free experience. Whether you’re expanding your living room, adding a new bedroom, or building a sunroom, we’re here to make sure your new roof is built to last.